Tablet install tutorials I used as starting points:
mzilvar (I copied just about everything he did.)
http://acurazine.com/forums/audio-bl...nstall-902876/
aameghoo
http://acurazine.com/forums/audio-bl...nstall-918601/
big_mac65
http://acurazine.com/forums/audio-bl...estion-918512/
NitroViper
http://acurazine.com/forums/audio-bl...s-pics-891106/
Kuchar09 at the XDA Developer Forum
http://forum.xda-developers.com/showthread.php?t=2113259
Hardware Purchased
An AUX Audio Input Adapter for your head unit.
I had one of these already when I did my tablet install. The one I use is no longer sold. Ask around or use Google to find a good one.
Asus Nexus 7 (2013 version) (WiFi only version [FLO])
FiiO E17 USB Digital to Analog Converter (DAC) (consider the E10 instead. Its cheaper.)
https://www.amazon.com/gp/product/B0070UFMOW/ref=oh_aui_detailpage_o01_s00?ie=UTF8&psc=1
USB On The Go (USB OTG) cables (I ordered more than one in case I accidently damaged one.)
![Amazon.com: OHCOME 2in1 Kits Micro USB Host OTG Cable with Micro USB Power + Micro USB Host OTG Cable With USB Plug Power for Samsung Nexus 7 Galaxy S2 / S3 / S4 & Galaxy Nexus, Samsung Galaxy Tab3 S4 i9500 i9505 S3 i9300 S2 i9100 S3 i9300 i9500 N5100 N7100: Cell Phones & Accessories]() Amazon.com: OHCOME 2in1 Kits Micro USB Host OTG Cable with Micro USB Power + Micro USB Host OTG Cable With USB Plug Power for Samsung Nexus 7 Galaxy S2 / S3 / S4 & Galaxy Nexus, Samsung Galaxy Tab3 S4 i9500 i9505 S3 i9300 S2 i9100 S3 i9300 i9500 N5100 N7100: Cell Phones & Accessories
Amazon.com: OHCOME 2in1 Kits Micro USB Host OTG Cable with Micro USB Power + Micro USB Host OTG Cable With USB Plug Power for Samsung Nexus 7 Galaxy S2 / S3 / S4 & Galaxy Nexus, Samsung Galaxy Tab3 S4 i9500 i9505 S3 i9300 S2 i9100 S3 i9300 i9500 N5100 N7100: Cell Phones & Accessories
USB 2.0 Extension Cables - 3 feet (2 of these)
http://www.monoprice.com/Product?c_id=103&cp_id=10303&cs_id=1030304&p_id=54 32&seq=1&format=2
USB 2.0 Extension Cable - 1.5 feet
http://www.monoprice.com/Product?c_id=103&cp_id=10303&cs_id=1030304&p_id=54 31&seq=1&format=2
DC 12V/24V to 5V 5A/25W Power Converter (Works great. Get this or another one with sustained high current capability.)
https://www.amazon.com/gp/product/B00CE75K0W/ref=oh_aui_detailpage_o02_s00?ie=UTF8&psc=1
Sabrent brand USB 2.0 Hubs
https://www.amazon.com/gp/product/B00BWF5U0M/ref=oh_aui_detailpage_o04_s00?ie=UTF8&psc=1
Cooper Bussmann/ATM fuse tap (purchased locally)
Cooper Bussmann/ATM fuse tap BP-HHH-RP at AutoZone.com - 1 reviews
5 amp Automotive Micro Fuses
(Purchased at local Honda dealer. The parts guy said no-one has purchased these in a long time).
Optional but Highly Recommended:
A used Center Console and HVAC/Radio display for your vehicle. Both can be found on eBay for around $60 each. I made some big mistakes with my stuff. Thankfully, I still had the ones that came with my car to try again.
Other materials:
Speaker wire (for extending stock wires) purchased at local Walmart for ~ $10.
(I used 16 gauge wire, but I would use 18 gauge if I had to do it over again.)
Heat shrink tube (purchased at a local Home Depot). You will need lots of these.
Tools Used (The Less Obvious Stuff)
Safety Glasses
Particle Filter Mask
Dremel Multi-Tool (So helpful. If you don't have one, buy one.)
Wire Stripper (Self-Adjusting)
Exacto Knife
Soldering Iron
Solder
Software Purchased (Ill assume you already rooted your tablet):
$30 - Timurs USB Kernel
https://timur.mobi/timurs-kernel-n7-2013/
This is a kernel for the Stock ROM. It enables simultaneous fast charge with, USB-OTG, DAC, and Deep Sleep which makes the tablet shut off when it loses external power. Unless you have a better idea, I suggest you spend the money on it. Its worked quite well for me.
$6.49 Tasker
https://play.google.com/store/apps/d....taskerm&hl=en
As of this date its on sale for $1.99. Automates functions on your android device. I tether my tablet to my 4G phone to get internet access on the tablet. I plan to setup Tasker on my phone to automatically enable WiFi Tethering when it detects that the Bluetooth antennae has connected to my Acuras HandsFreeLink. That way the tablet will get internet access from the phone whenever I start the car, and I wont have to touch the phone to make it happen.
Notes
1: I'll start by saying that Murphy's Law applies to this project, so be ready for it to take longer than you expected.
2: You will need to extend the existing wires using the speaker wire.
Solder the wires!
Don't try crimping the wires, or you'll be sorry. I tried it and several of the crimped connections came undone when I was struggling to stuff the head unit and display back in the dash. Yes, the thought of soldering over 40 wires (twice) is daunting, but you can do it.
3. Be careful with your Dremel; one moment of carelessness can leave you slicing into things you don't want to cut. I again recommend you purchase used parts to experiment on.
Picture Time
![Click the image to open in full size.]()
Disassembly
![Click the image to open in full size.]()
While this was apart, I decided to replace the bulbs in the heated seat switches. I used an aftermarket red bulb for the hi heat light, instead of the stock color.
![Click the image to open in full size.]()
Illumination bulb part# 35852-SEP-A02 It's $3-$5 each. The Honda dealer near me didn't have them. I had to get them from an Acura dealer.
![Click the image to open in full size.]()
Looking good again.
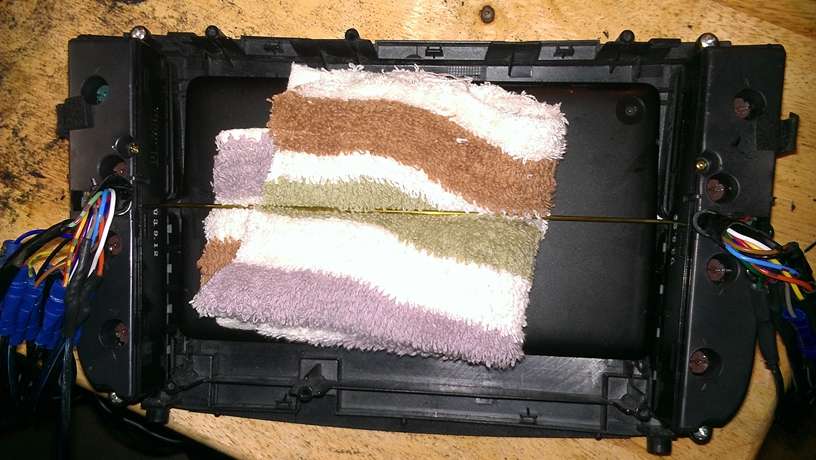
The stock HVAC/Radio display will be moved to where the cubbies are. The cubbies will be removed.
A flat surface is needed for the display to sit flush against the center console frame.
![Click the image to open in full size.]()
![Click the image to open in full size.]()
![Click the image to open in full size.]()
![Click the image to open in full size.]()
Test fit.
Lengthening the wires
![Click the image to open in full size.]()
2 feet of wire will be more than enough to reach the new HVAC/Radio display location. You're better off with wires that are slightly longer than necessary, than too short. Just remember there isn't much room in your dash so don't make them too long.
Soldering
![Click the image to open in full size.]()
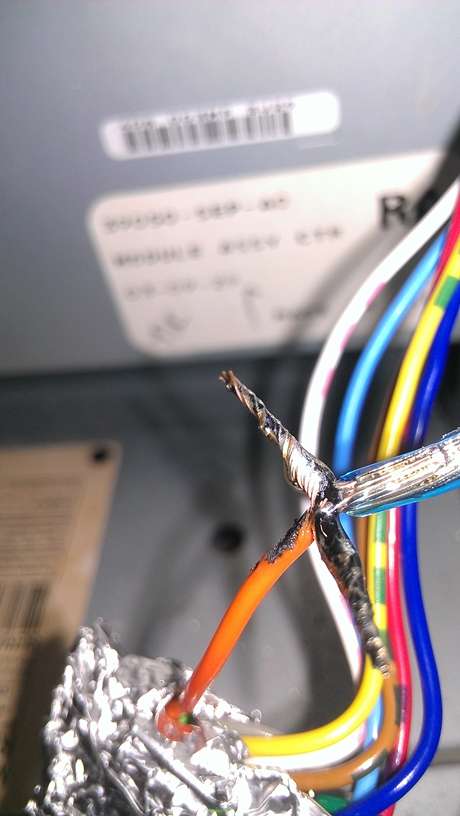
The foil you see is used to keep me melting the green harness, if I accidentally brush the soldering iron against it.
![Click the image to open in full size.]()
![Click the image to open in full size.]()
![Click the image to open in full size.]()
![Click the image to open in full size.]()
![Click the image to open in full size.]()
Heat Shrink tube.
![Click the image to open in full size.]()
Many hours later....test run. You'll notice that the bottom corners are cut off of the printed circuit board. I needed to do this to accommodate the air ducts that run down the center console for the back seat vents.
![Click the image to open in full size.]()
![Click the image to open in full size.]()
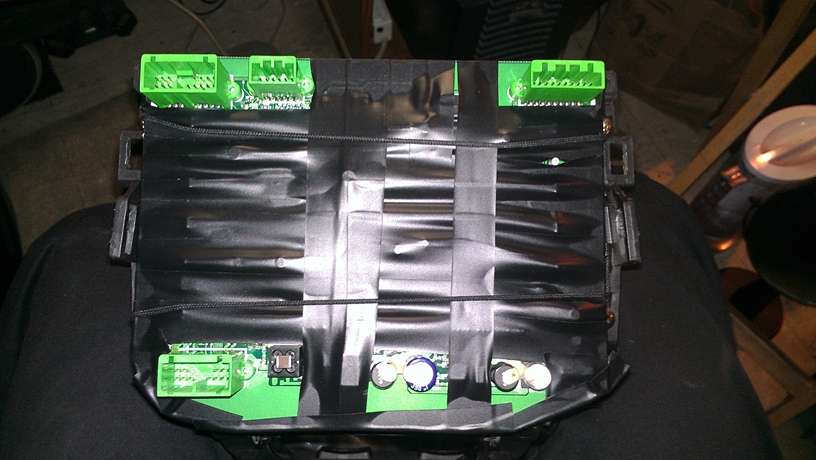
Electrical tape wrapped around everything, because I'm paranoid.
![Click the image to open in full size.]()
A piece of Acrylic from Home Depot used to take up the space between the HVAC/Radio Display and the center console frame.
![Click the image to open in full size.]()
Painting the acrylic black. The surrounding areas are masked off with tape.
![Click the image to open in full size.]()
Securing the PCB to the Console Frame
![Click the image to open in full size.]()
Shoe lace tied around the stock screws.
![Click the image to open in full size.]()
![Click the image to open in full size.]()
![Click the image to open in full size.]()
![Click the image to open in full size.]()
![Click the image to open in full size.]()
Fitting the Tablet
This is the part that gave me the most difficulty during this project. The USB port on the 2nd generation Nexus 7 cannot be removed from the board. To make it the USB cable fit, I had to hollow out both the Mode and A/C buttons on the passenger side controls. It took a lot of trial and error to get it right. I would get it to fit, but the USB cable would cause the climate control buttons to stick.
There was also the issue of fitment of the tablet itself. There's little wiggle room in there, and sometimes the tablet itself would press against the sides of the climate control buttons causing them to stick.
Another problem was that sometimes when I did press the buttons, they would knock loose the USB cable from the tablet.
Eventually it all worked out, but it took a lot of cutting, and tweaking to get everything to fit flush and functional.
![Click the image to open in full size.]()
![Click the image to open in full size.]()
![Click the image to open in full size.]()
Oh @#$%. Be careful with that Dremel.
![Click the image to open in full size.]()
Hollowing out the HVAC buttons.
![Click the image to open in full size.]()
This is the USB OTG cable. As you can see, I had to break the casing off of the cable to make it fit between the tablet and the HVAC buttons.
![Click the image to open in full size.]()
Better safe than sorry, but even some of this had to be removed as it too ended up interfering with the HVAC buttons.
![Click the image to open in full size.]()
![Click the image to open in full size.]()
[img]http://imageshack.com/a/img907/9017/xss96y.jpg[/img
Short USB extension cable.
![Click the image to open in full size.]()
![Click the image to open in full size.]()
![Click the image to open in full size.]()
![Click the image to open in full size.]()
![Click the image to open in full size.]()
![Click the image to open in full size.]()
This is how I fastened the tablet to the frame. No glue needed here. Ignore the crimp connectors. This picture was taken before I went back to solder everything.
![Click the image to open in full size.]()
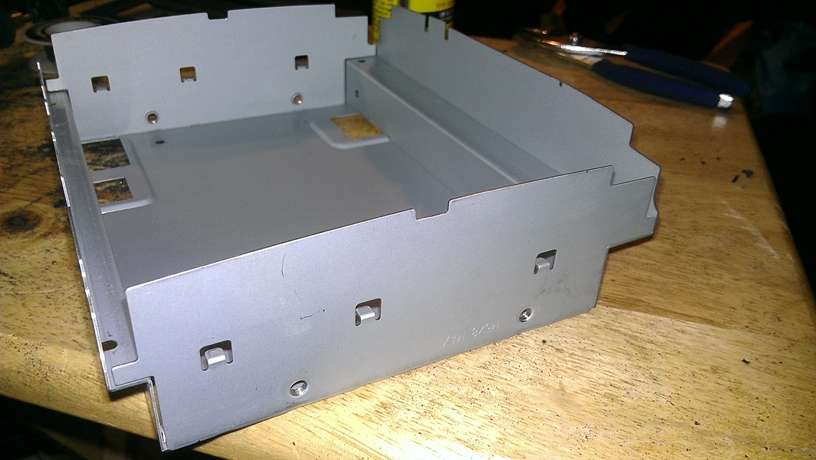
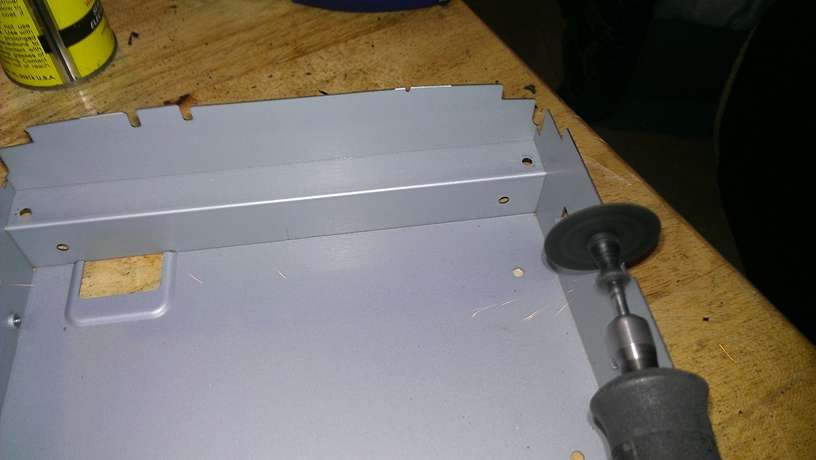
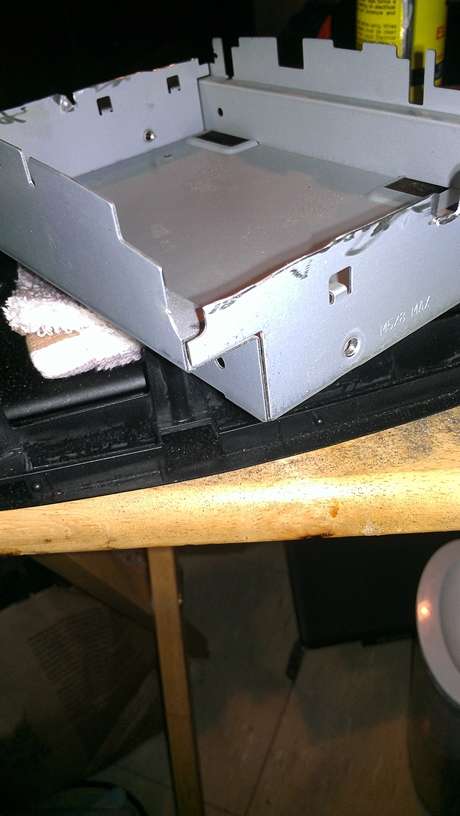
You'll need this to make everything stay attached in the car. I had to cut the sides way down to accommodate the tablet and the USB OTG cable.
![Click the image to open in full size.]()
![Click the image to open in full size.]()
![Click the image to open in full size.]()
![Click the image to open in full size.]()
![Click the image to open in full size.]()
DC to DC power supply with micro USB connector I soldered on the output side, and an inline fuse connector I soldered to the input side.
![Click the image to open in full size.]()
I soldered the input of the DC-DC power adapter to the cigarette lighter line. I used some speaker wire to extend the length of the connection so the DC-DC adapter can sit at the top of the dash, near the center channel speaker.
![Click the image to open in full size.]()
![Click the image to open in full size.]()
5 amp fuse.
![Click the image to open in full size.]()
I grounded everything here.
![Click the image to open in full size.]()
Toiling at crazy hours.
![Click the image to open in full size.]()
I had to lengthen these wires too.
![Click the image to open in full size.]()
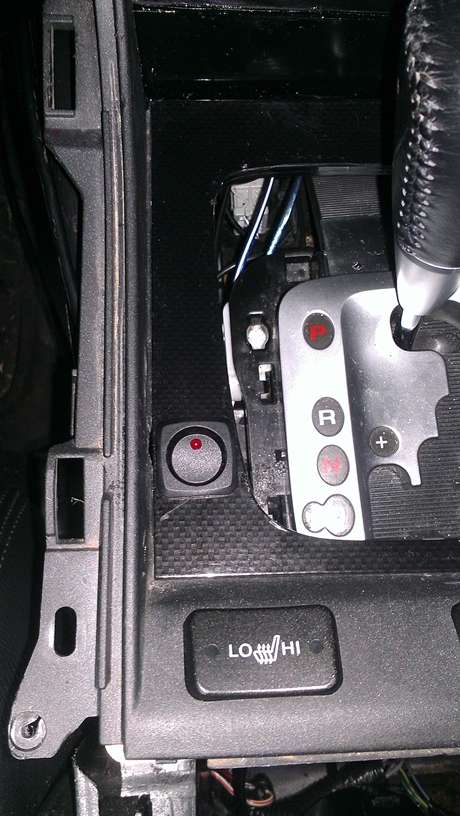
I opted to include a toggle switch so the tablet can charge while the vehicle is off. I mounted the switch to the center console, left of the transmission lever. I wired it to the driver seat slide fuse, since that fuse is constantly powered.
![Click the image to open in full size.]()
![Click the image to open in full size.]()
![Click the image to open in full size.]()
Switch end of the wire.
![Click the image to open in full size.]()
Fuse box end of the wire, with fuse tap soldered on
![Click the image to open in full size.]()
5 amp fuse for the switch, and the stock 20 amp fuse for the driver's seat.
![Click the image to open in full size.]()
![Click the image to open in full size.]()
Power in the middle, ground at the top, accessory at the bottom. I blew fuses figuring this one out.
Audio
![Click the image to open in full size.]()
USB DAC
![Click the image to open in full size.]()
Test run using DSub for Android. In the car, I found that a volume setting of 45 on the FiiO E17 worked best for me.
![Click the image to open in full size.]()
All buttoned up. The thing on the left is a ProClip brand holder for my cell phone.
![Click the image to open in full size.]()
The longer USB extension cables run through the center console to this USB hub.
![Click the image to open in full size.]()
Remember to set the FiiO to remember the last volume setting you used, or it will reset to 20 every time you switch it back on.
mzilvar (I copied just about everything he did.)
http://acurazine.com/forums/audio-bl...nstall-902876/
aameghoo
http://acurazine.com/forums/audio-bl...nstall-918601/
big_mac65
http://acurazine.com/forums/audio-bl...estion-918512/
NitroViper
http://acurazine.com/forums/audio-bl...s-pics-891106/
Kuchar09 at the XDA Developer Forum
http://forum.xda-developers.com/showthread.php?t=2113259
Hardware Purchased
An AUX Audio Input Adapter for your head unit.
I had one of these already when I did my tablet install. The one I use is no longer sold. Ask around or use Google to find a good one.
Asus Nexus 7 (2013 version) (WiFi only version [FLO])
http://www.amazon.com/gp/product/B00DVFLJKQ/ref=oh_aui_detailpage_o04_s01?ie=UTF8&psc=1">![<font color=]() http://www.amazon.com/gp/product/B00DVFLJKQ/ref=oh_aui_detailpage_o04_s01?ie=UTF8&psc=1" /> http://www.amazon.com/gp/product/B00DVFLJKQ/ref=oh_aui_detailpage_o04_s01?ie=UTF8&psc=1">http://www.amazon.com/gp/product/B00DVFLJKQ/ref=oh_aui_detailpage_o04_s01?ie=UTF8&psc=1
http://www.amazon.com/gp/product/B00DVFLJKQ/ref=oh_aui_detailpage_o04_s01?ie=UTF8&psc=1" /> http://www.amazon.com/gp/product/B00DVFLJKQ/ref=oh_aui_detailpage_o04_s01?ie=UTF8&psc=1">http://www.amazon.com/gp/product/B00DVFLJKQ/ref=oh_aui_detailpage_o04_s01?ie=UTF8&psc=1
FiiO E17 USB Digital to Analog Converter (DAC) (consider the E10 instead. Its cheaper.)
https://www.amazon.com/gp/product/B0070UFMOW/ref=oh_aui_detailpage_o01_s00?ie=UTF8&psc=1
USB On The Go (USB OTG) cables (I ordered more than one in case I accidently damaged one.)
USB 2.0 Extension Cables - 3 feet (2 of these)
http://www.monoprice.com/Product?c_id=103&cp_id=10303&cs_id=1030304&p_id=54 32&seq=1&format=2
USB 2.0 Extension Cable - 1.5 feet
http://www.monoprice.com/Product?c_id=103&cp_id=10303&cs_id=1030304&p_id=54 31&seq=1&format=2
DC 12V/24V to 5V 5A/25W Power Converter (Works great. Get this or another one with sustained high current capability.)
https://www.amazon.com/gp/product/B00CE75K0W/ref=oh_aui_detailpage_o02_s00?ie=UTF8&psc=1
Sabrent brand USB 2.0 Hubs
https://www.amazon.com/gp/product/B00BWF5U0M/ref=oh_aui_detailpage_o04_s00?ie=UTF8&psc=1
Cooper Bussmann/ATM fuse tap (purchased locally)
Cooper Bussmann/ATM fuse tap BP-HHH-RP at AutoZone.com - 1 reviews
5 amp Automotive Micro Fuses
(Purchased at local Honda dealer. The parts guy said no-one has purchased these in a long time).
Optional but Highly Recommended:
A used Center Console and HVAC/Radio display for your vehicle. Both can be found on eBay for around $60 each. I made some big mistakes with my stuff. Thankfully, I still had the ones that came with my car to try again.
Other materials:
Speaker wire (for extending stock wires) purchased at local Walmart for ~ $10.
(I used 16 gauge wire, but I would use 18 gauge if I had to do it over again.)
Heat shrink tube (purchased at a local Home Depot). You will need lots of these.
Tools Used (The Less Obvious Stuff)
Safety Glasses
Particle Filter Mask
Dremel Multi-Tool (So helpful. If you don't have one, buy one.)
Wire Stripper (Self-Adjusting)
Exacto Knife
Soldering Iron
Solder
Software Purchased (Ill assume you already rooted your tablet):
$30 - Timurs USB Kernel
https://timur.mobi/timurs-kernel-n7-2013/
This is a kernel for the Stock ROM. It enables simultaneous fast charge with, USB-OTG, DAC, and Deep Sleep which makes the tablet shut off when it loses external power. Unless you have a better idea, I suggest you spend the money on it. Its worked quite well for me.
$6.49 Tasker
https://play.google.com/store/apps/d....taskerm&hl=en
As of this date its on sale for $1.99. Automates functions on your android device. I tether my tablet to my 4G phone to get internet access on the tablet. I plan to setup Tasker on my phone to automatically enable WiFi Tethering when it detects that the Bluetooth antennae has connected to my Acuras HandsFreeLink. That way the tablet will get internet access from the phone whenever I start the car, and I wont have to touch the phone to make it happen.
Notes
1: I'll start by saying that Murphy's Law applies to this project, so be ready for it to take longer than you expected.
2: You will need to extend the existing wires using the speaker wire.
Solder the wires!
Don't try crimping the wires, or you'll be sorry. I tried it and several of the crimped connections came undone when I was struggling to stuff the head unit and display back in the dash. Yes, the thought of soldering over 40 wires (twice) is daunting, but you can do it.
3. Be careful with your Dremel; one moment of carelessness can leave you slicing into things you don't want to cut. I again recommend you purchase used parts to experiment on.
Picture Time
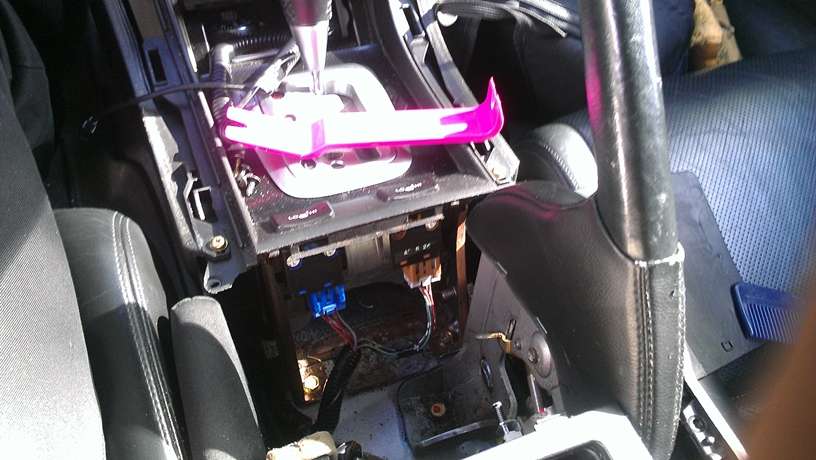
Disassembly
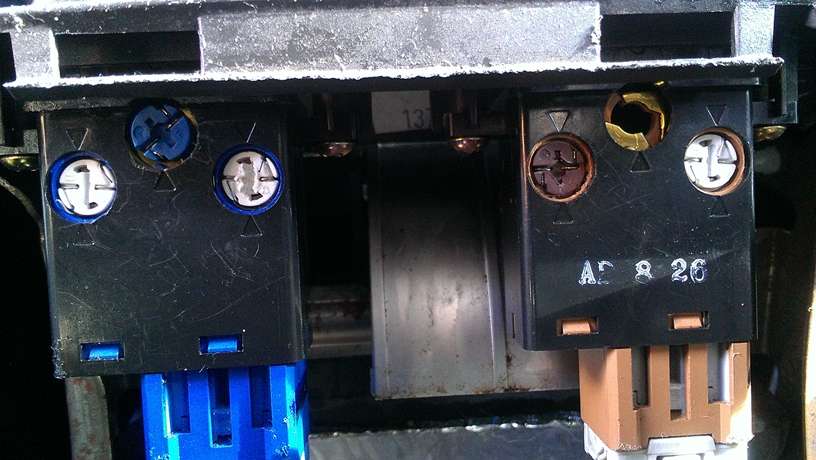
While this was apart, I decided to replace the bulbs in the heated seat switches. I used an aftermarket red bulb for the hi heat light, instead of the stock color.
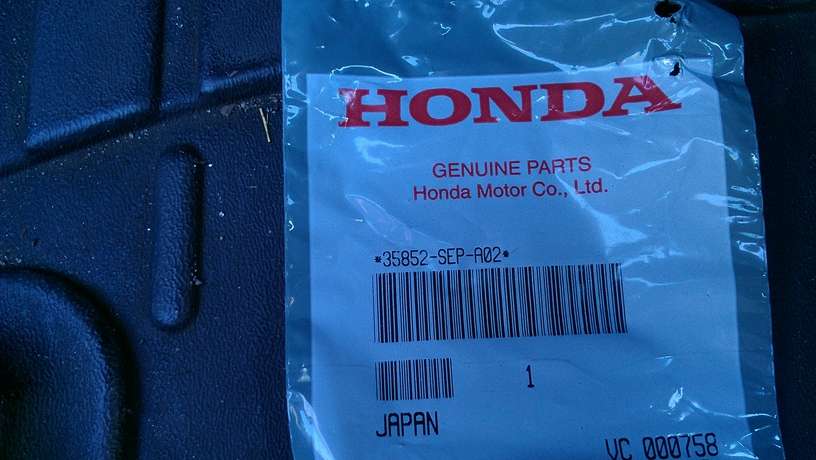
Illumination bulb part# 35852-SEP-A02 It's $3-$5 each. The Honda dealer near me didn't have them. I had to get them from an Acura dealer.
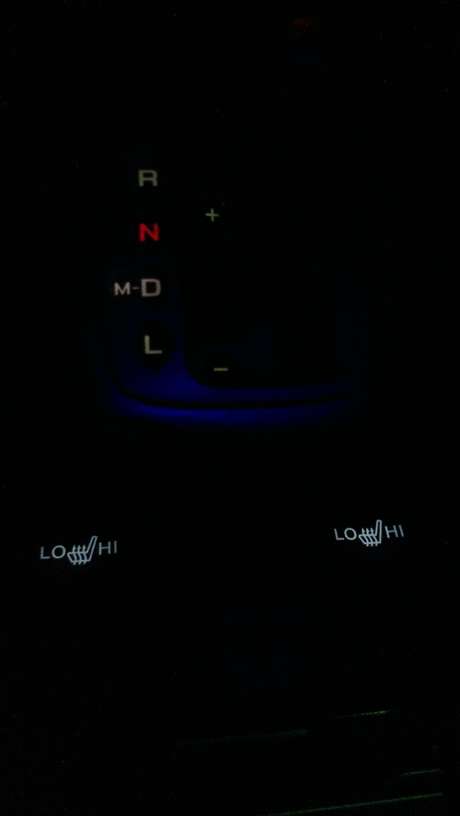
Looking good again.
The stock HVAC/Radio display will be moved to where the cubbies are. The cubbies will be removed.
A flat surface is needed for the display to sit flush against the center console frame.
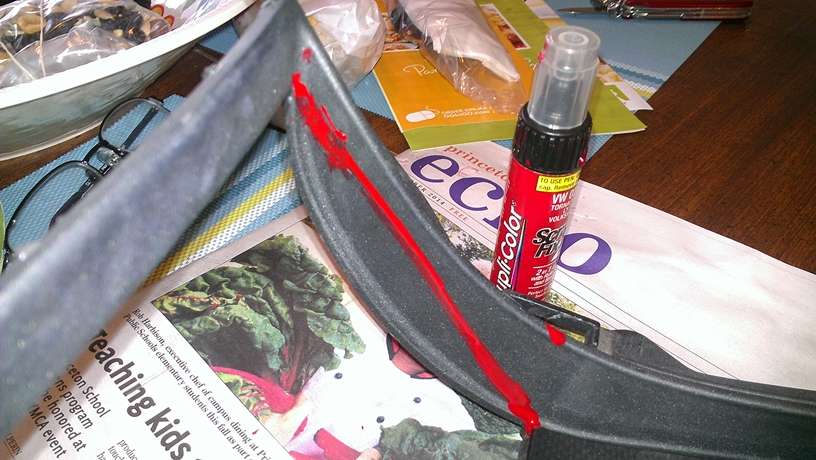

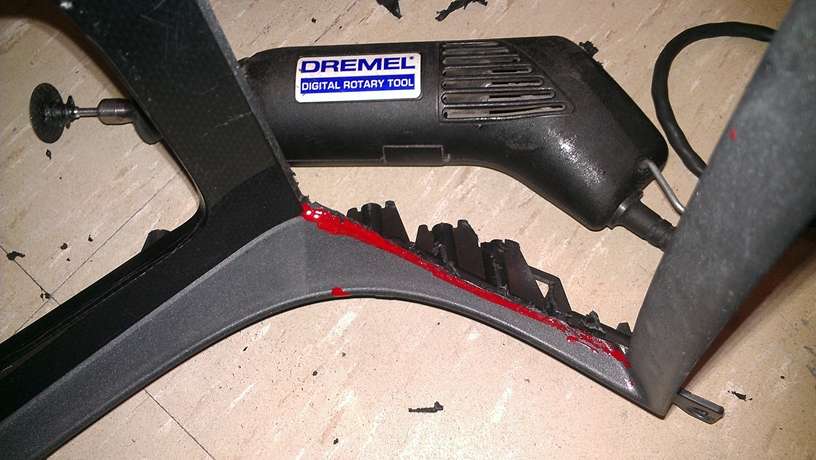
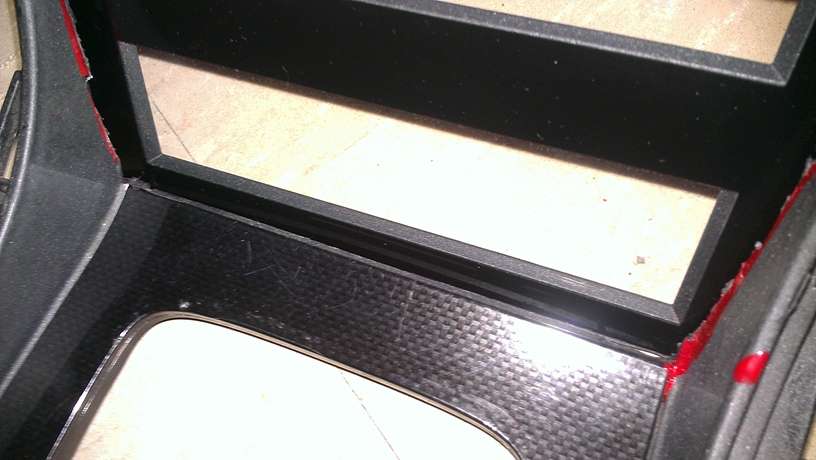
Test fit.
Lengthening the wires

2 feet of wire will be more than enough to reach the new HVAC/Radio display location. You're better off with wires that are slightly longer than necessary, than too short. Just remember there isn't much room in your dash so don't make them too long.
Soldering

The foil you see is used to keep me melting the green harness, if I accidentally brush the soldering iron against it.

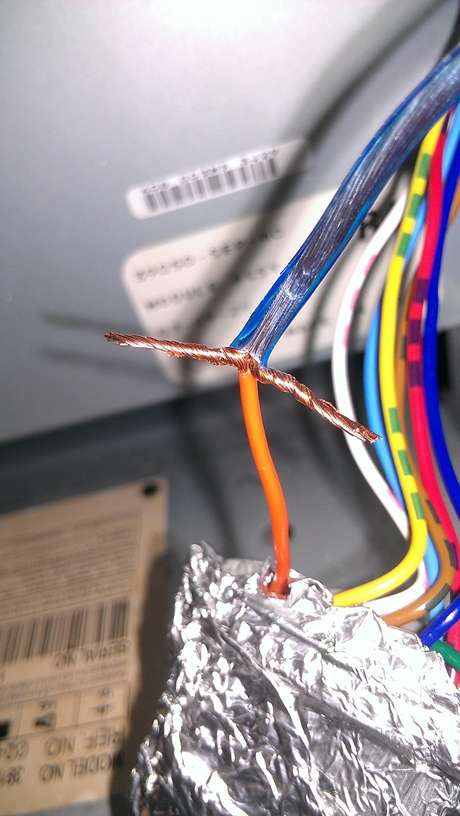


Heat Shrink tube.
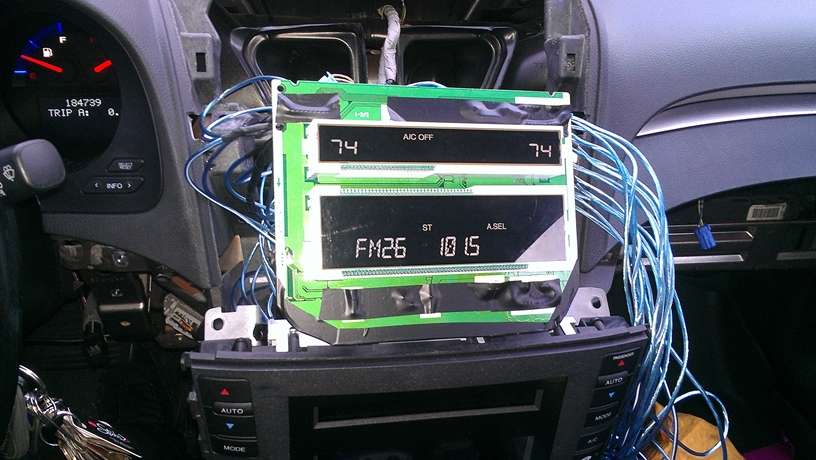
Many hours later....test run. You'll notice that the bottom corners are cut off of the printed circuit board. I needed to do this to accommodate the air ducts that run down the center console for the back seat vents.
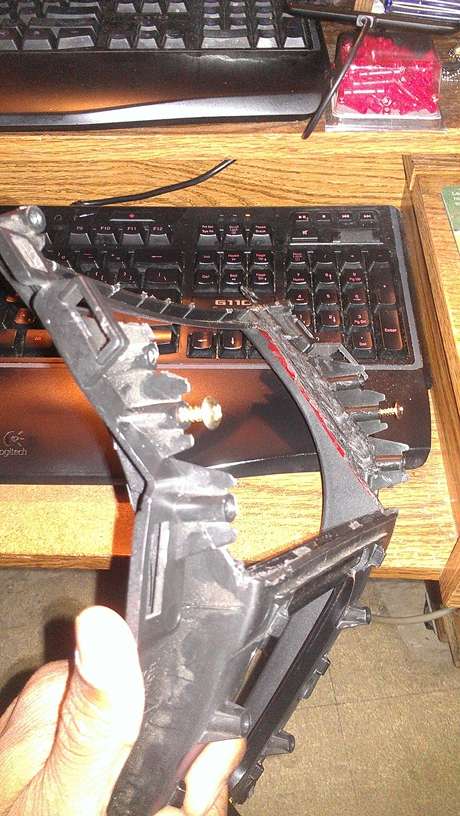
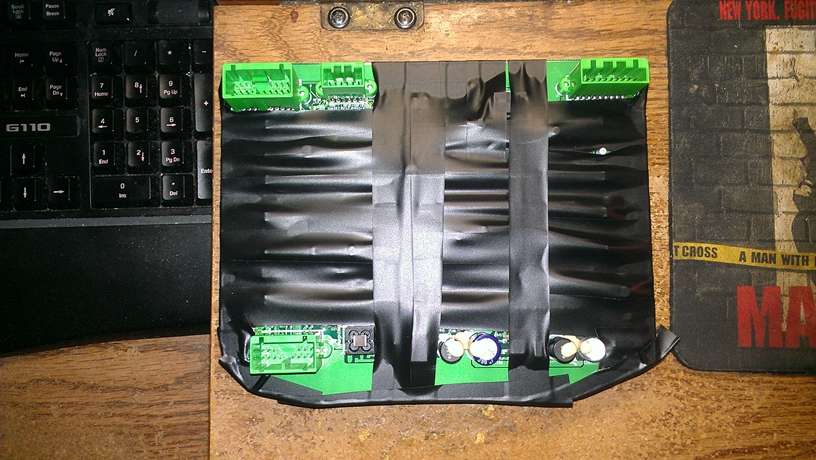
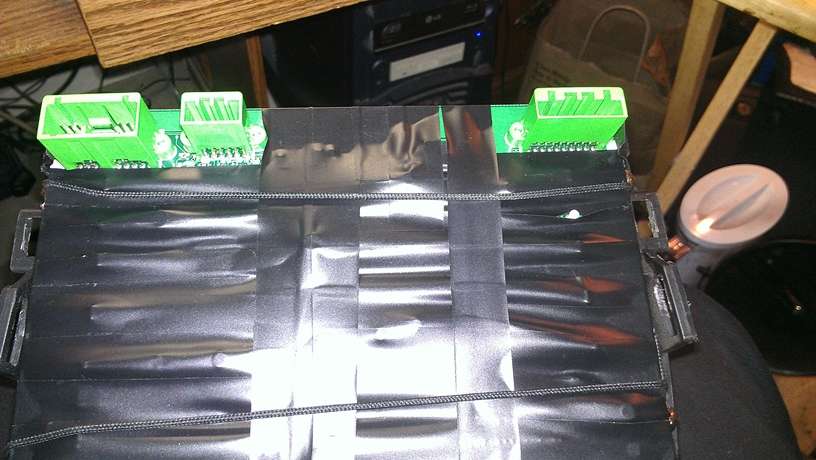
Electrical tape wrapped around everything, because I'm paranoid.
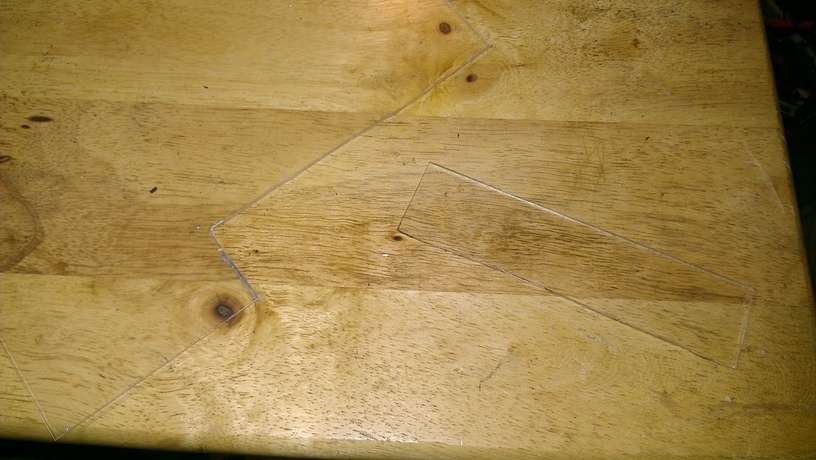
A piece of Acrylic from Home Depot used to take up the space between the HVAC/Radio Display and the center console frame.
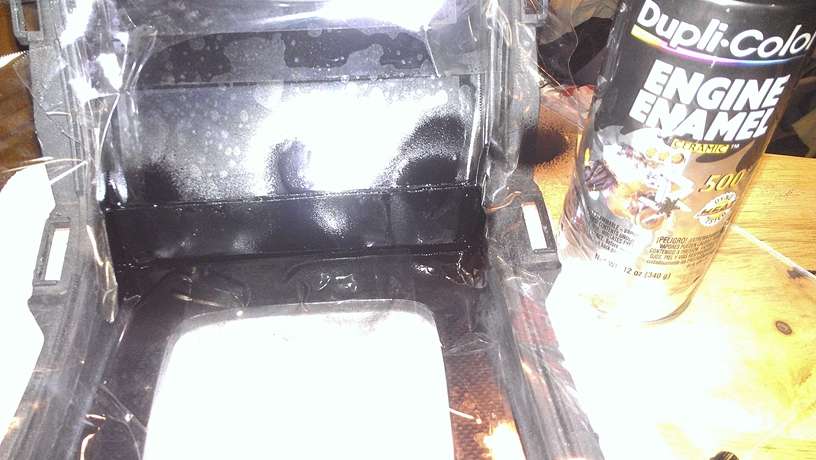
Painting the acrylic black. The surrounding areas are masked off with tape.
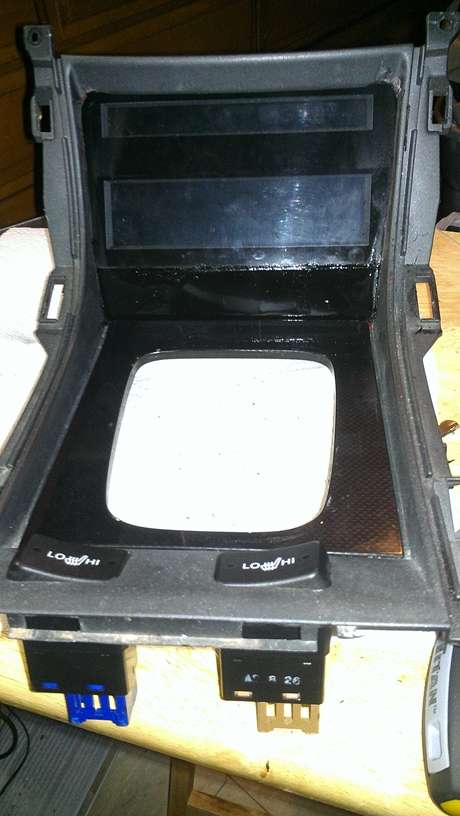
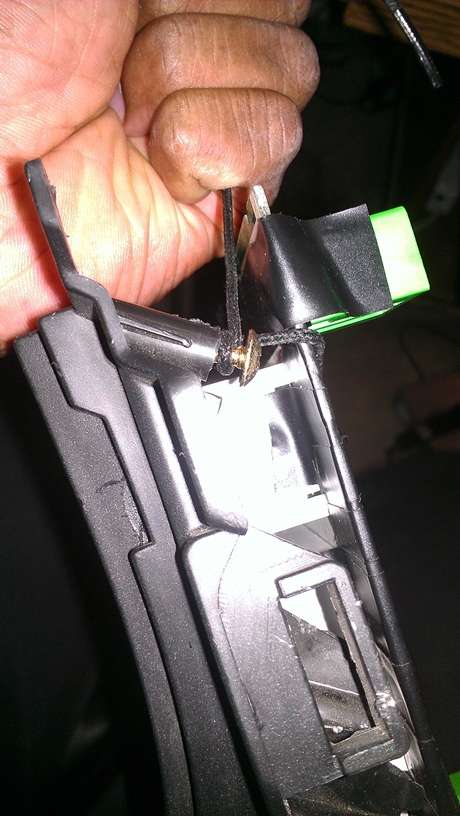
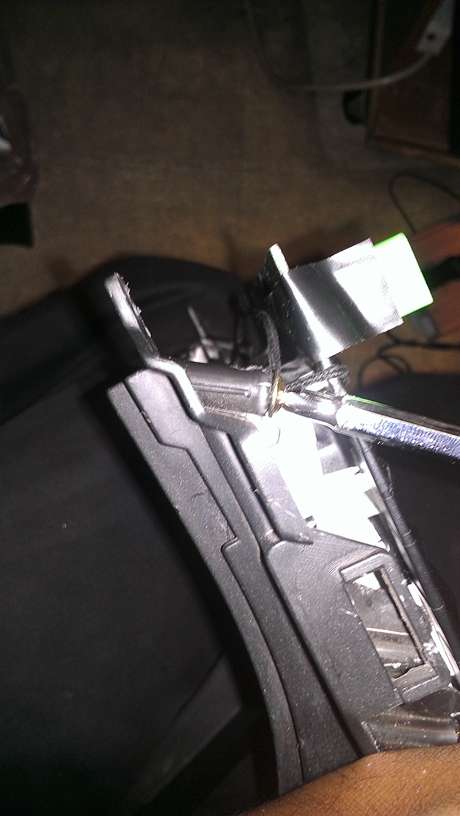
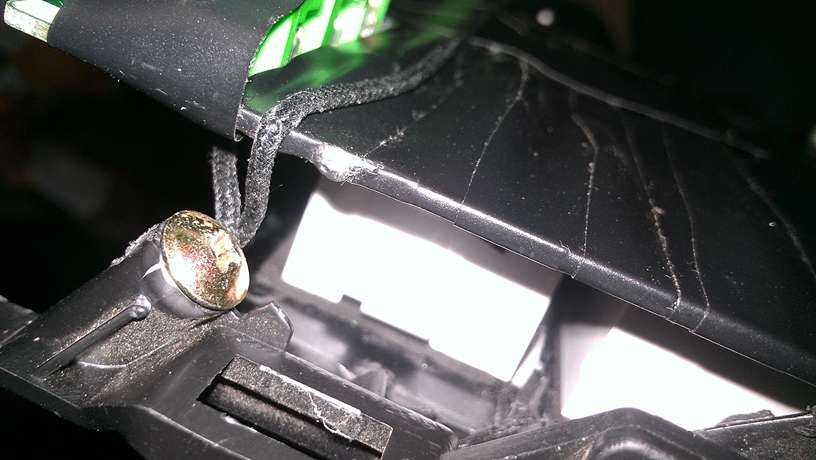
Securing the PCB to the Console Frame
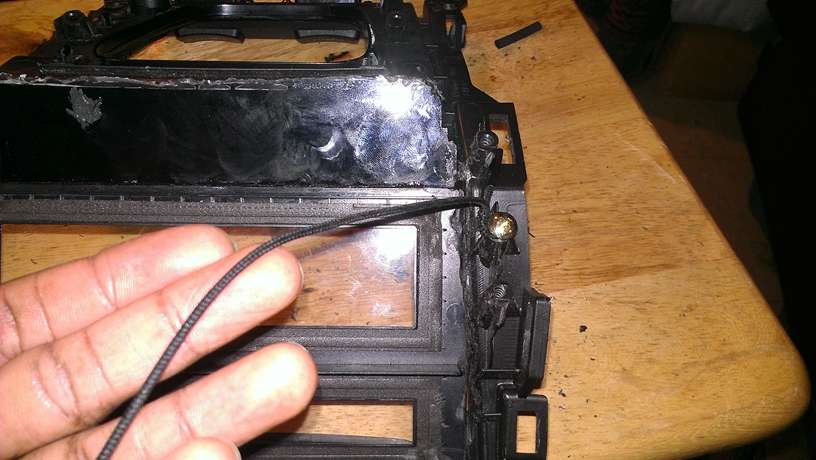
Shoe lace tied around the stock screws.
Fitting the Tablet
This is the part that gave me the most difficulty during this project. The USB port on the 2nd generation Nexus 7 cannot be removed from the board. To make it the USB cable fit, I had to hollow out both the Mode and A/C buttons on the passenger side controls. It took a lot of trial and error to get it right. I would get it to fit, but the USB cable would cause the climate control buttons to stick.
There was also the issue of fitment of the tablet itself. There's little wiggle room in there, and sometimes the tablet itself would press against the sides of the climate control buttons causing them to stick.
Another problem was that sometimes when I did press the buttons, they would knock loose the USB cable from the tablet.
Eventually it all worked out, but it took a lot of cutting, and tweaking to get everything to fit flush and functional.
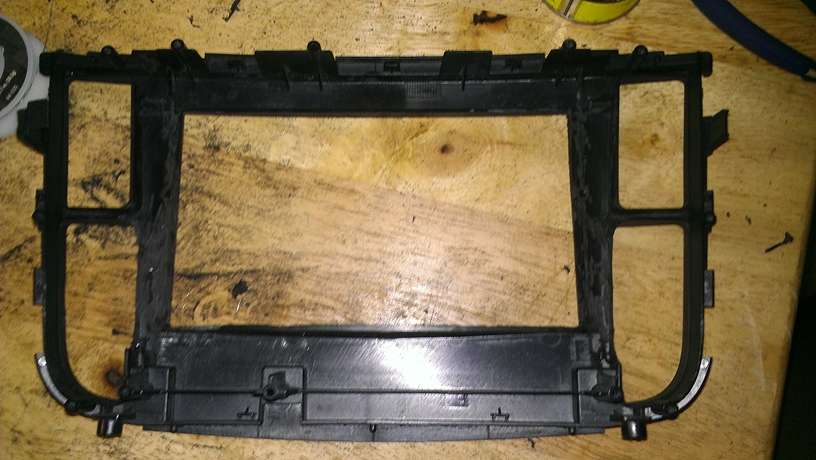
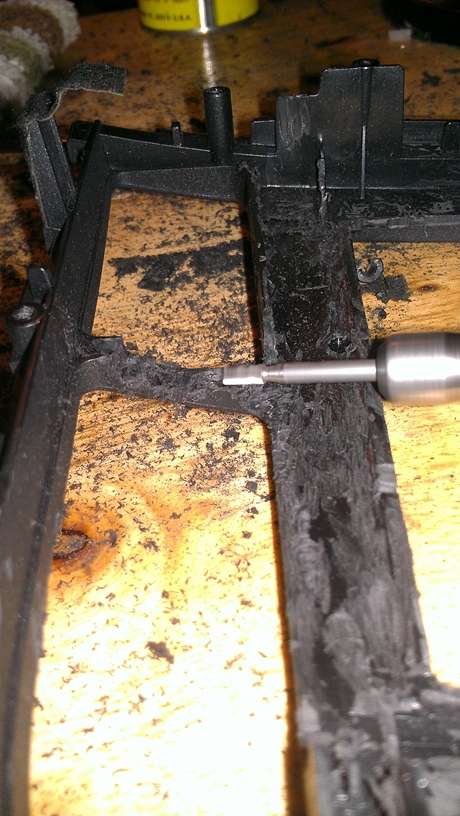
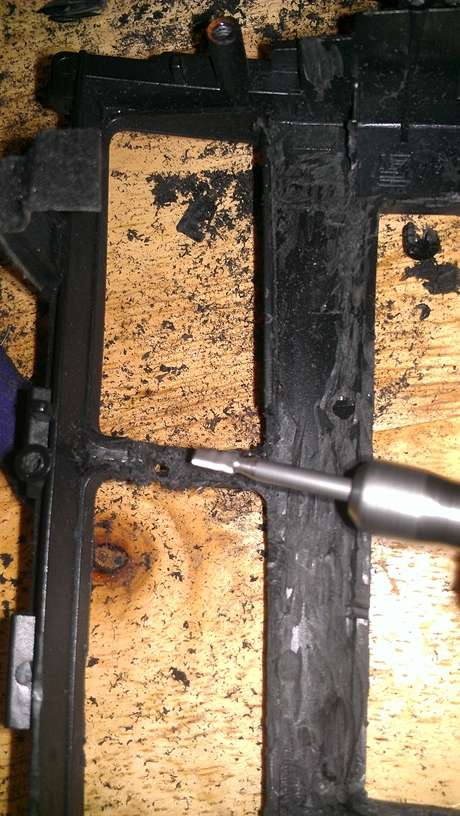
Oh @#$%. Be careful with that Dremel.
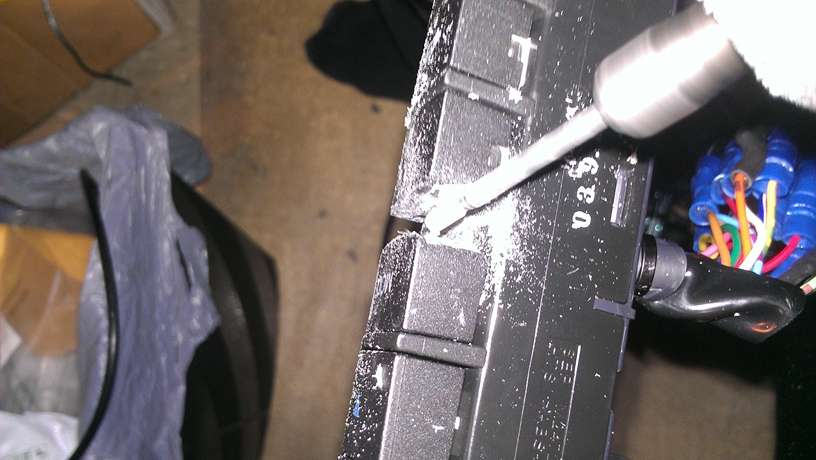
Hollowing out the HVAC buttons.

This is the USB OTG cable. As you can see, I had to break the casing off of the cable to make it fit between the tablet and the HVAC buttons.
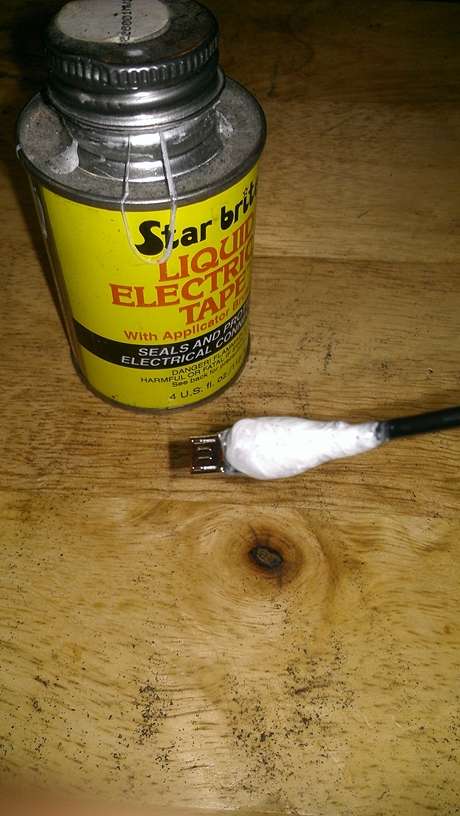
Better safe than sorry, but even some of this had to be removed as it too ended up interfering with the HVAC buttons.
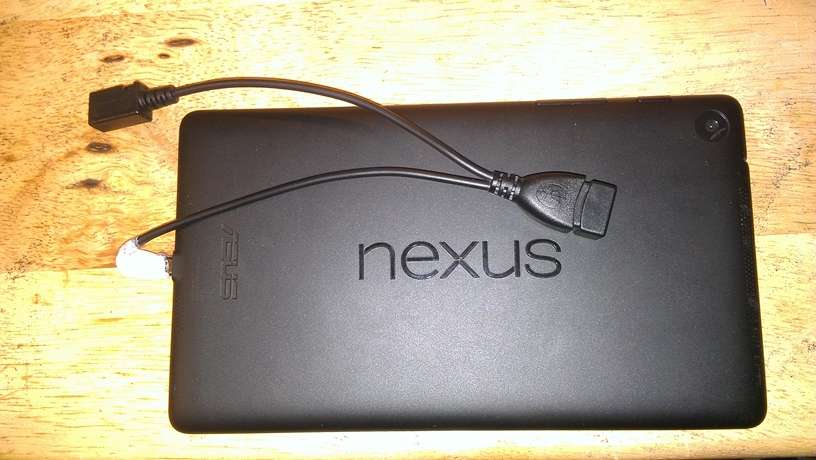

[img]http://imageshack.com/a/img907/9017/xss96y.jpg[/img
Short USB extension cable.
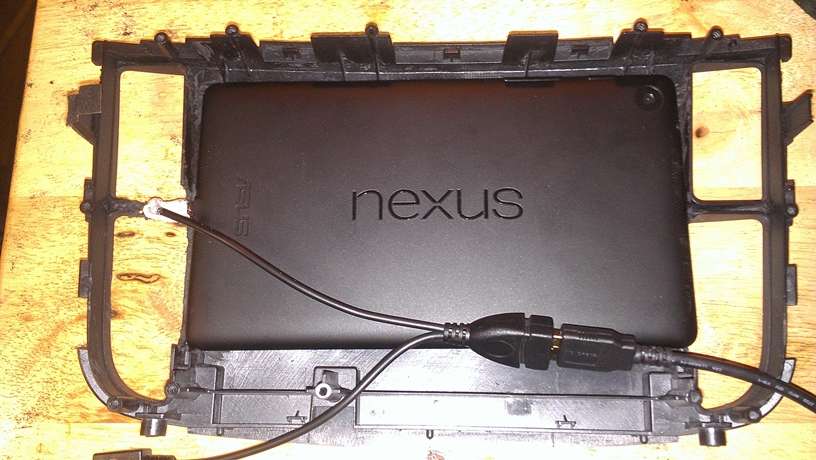
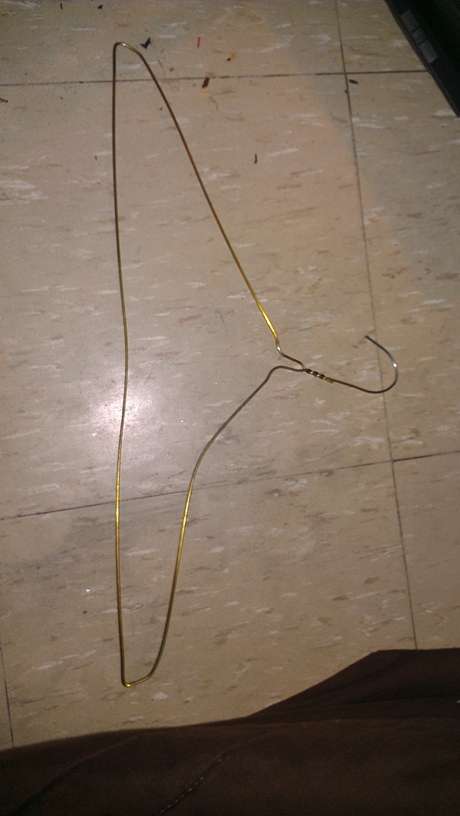
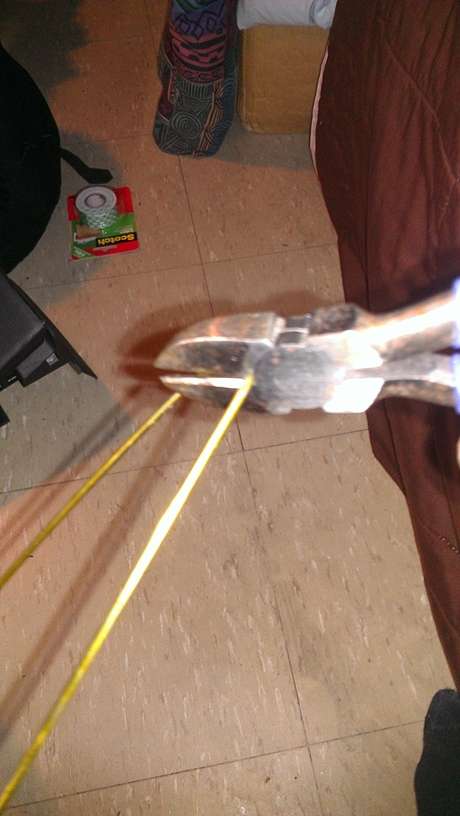
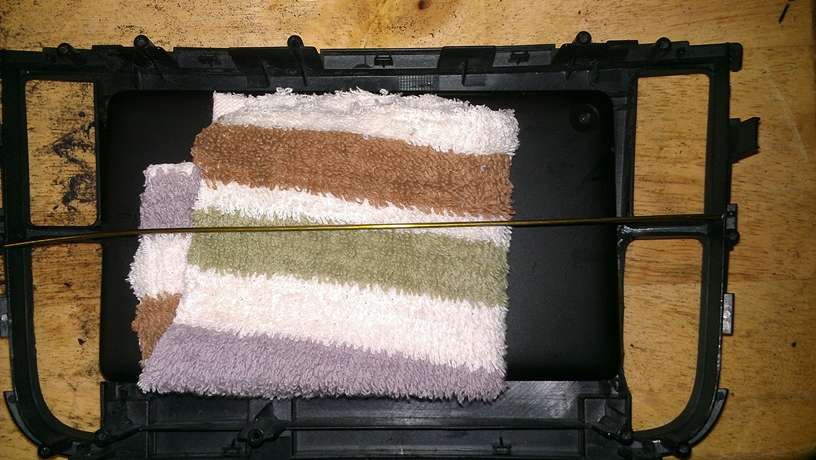
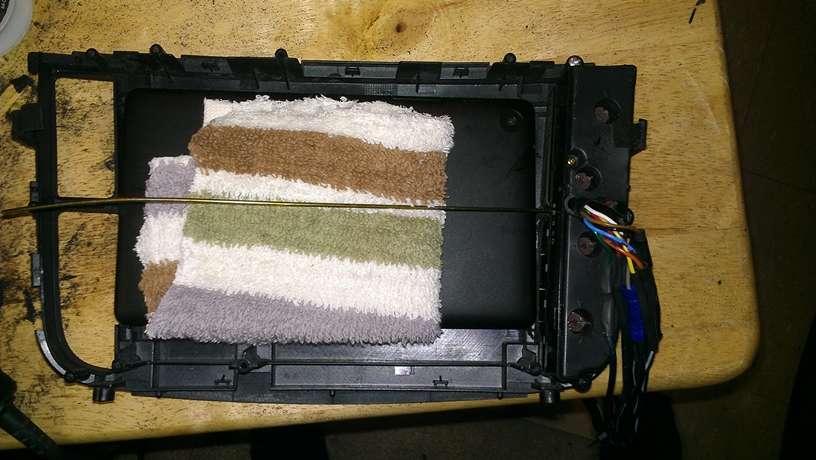
This is how I fastened the tablet to the frame. No glue needed here. Ignore the crimp connectors. This picture was taken before I went back to solder everything.
You'll need this to make everything stay attached in the car. I had to cut the sides way down to accommodate the tablet and the USB OTG cable.
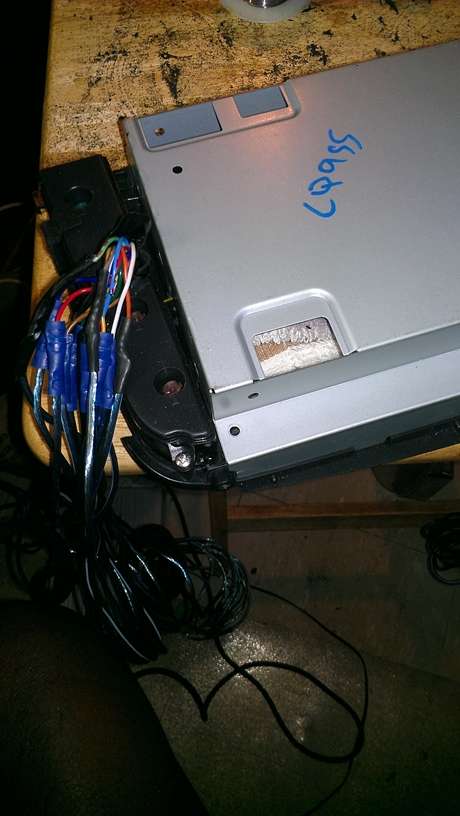
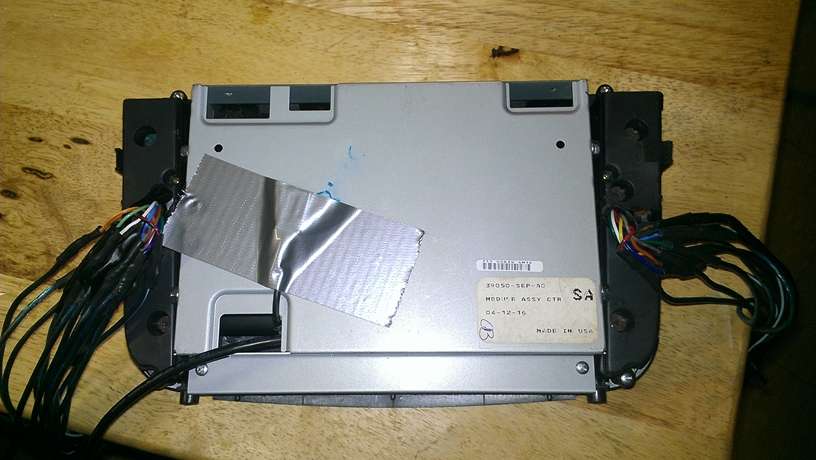

DC to DC power supply with micro USB connector I soldered on the output side, and an inline fuse connector I soldered to the input side.
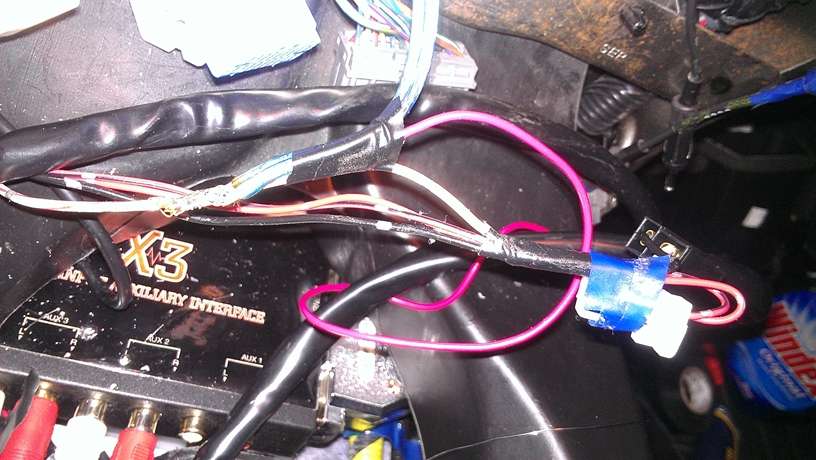
I soldered the input of the DC-DC power adapter to the cigarette lighter line. I used some speaker wire to extend the length of the connection so the DC-DC adapter can sit at the top of the dash, near the center channel speaker.
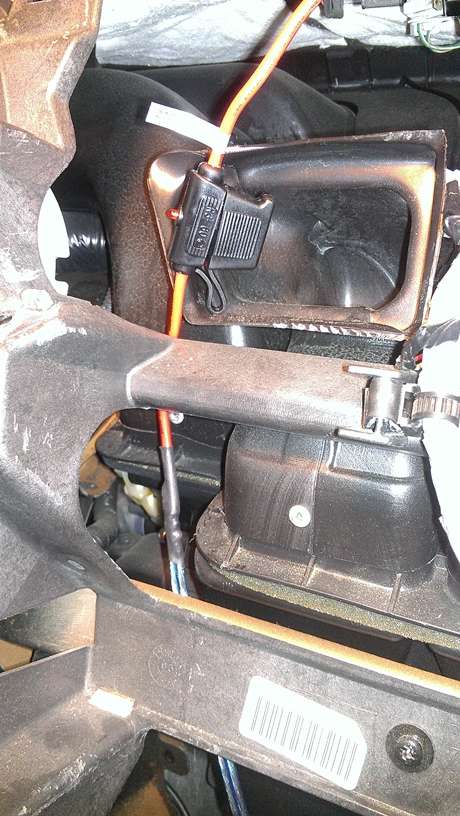

5 amp fuse.
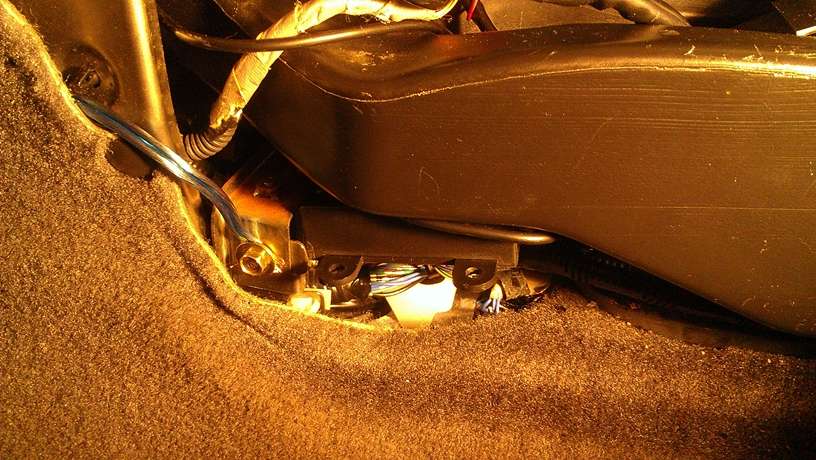
I grounded everything here.

Toiling at crazy hours.
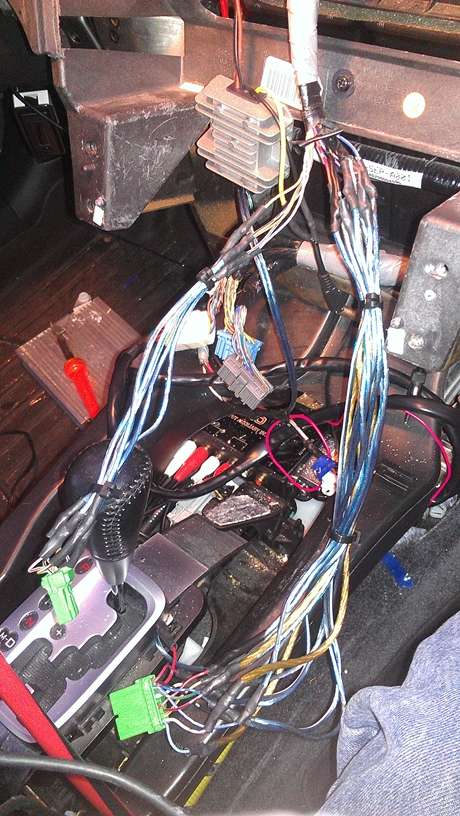
I had to lengthen these wires too.
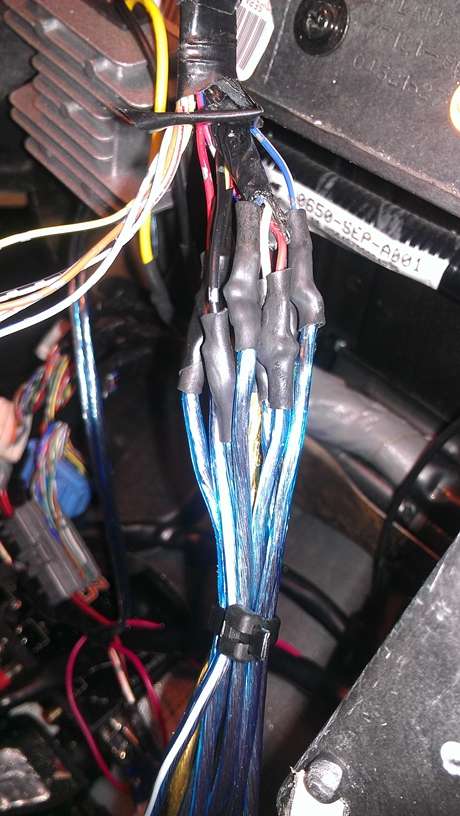
I opted to include a toggle switch so the tablet can charge while the vehicle is off. I mounted the switch to the center console, left of the transmission lever. I wired it to the driver seat slide fuse, since that fuse is constantly powered.
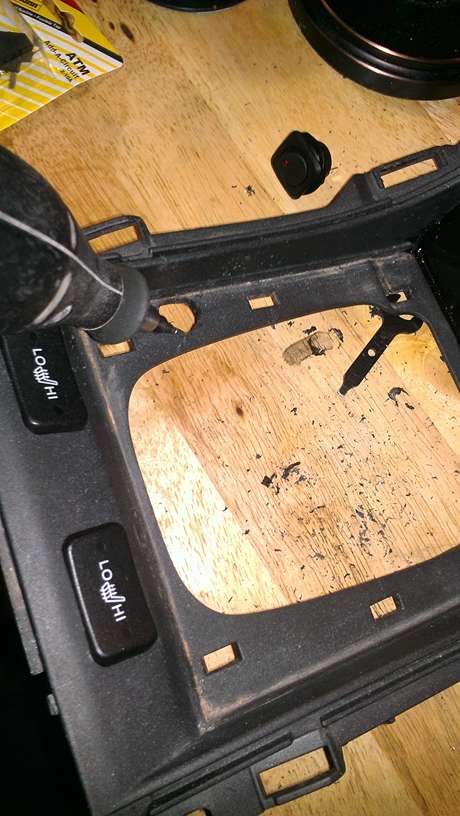
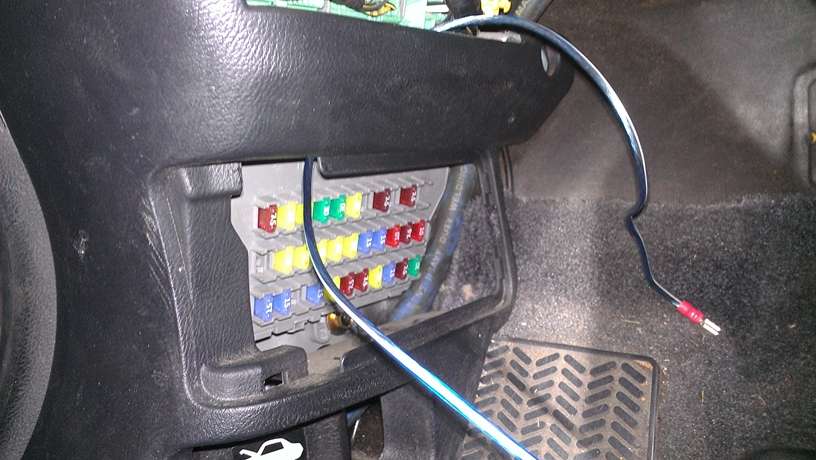
Switch end of the wire.
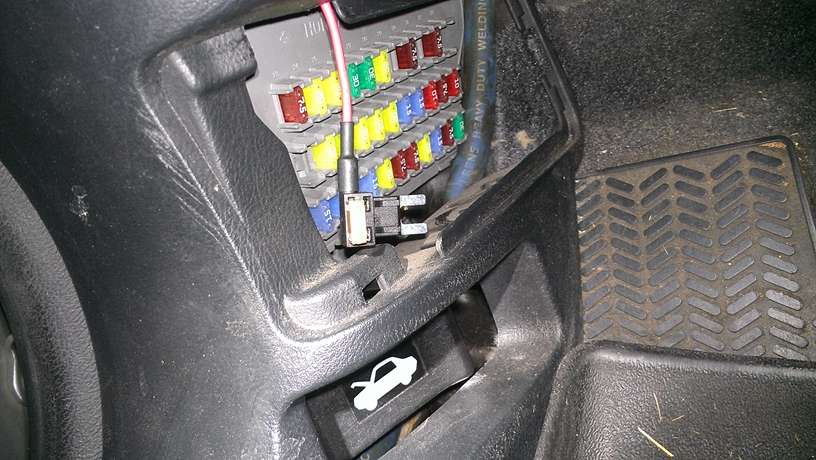
Fuse box end of the wire, with fuse tap soldered on
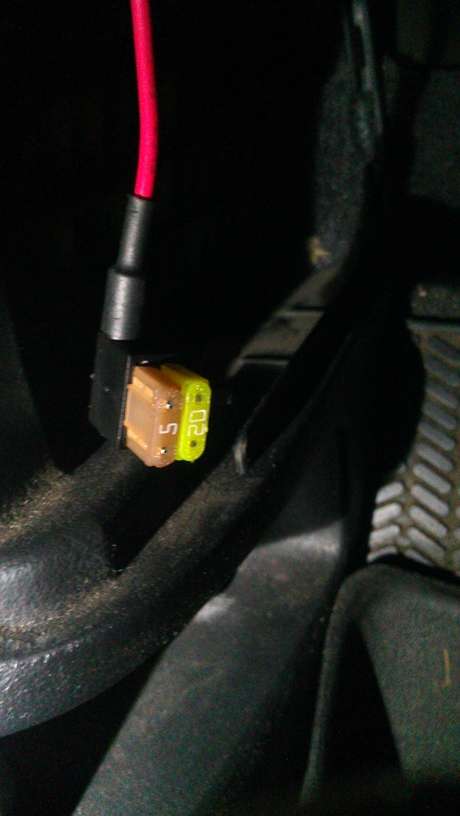
5 amp fuse for the switch, and the stock 20 amp fuse for the driver's seat.
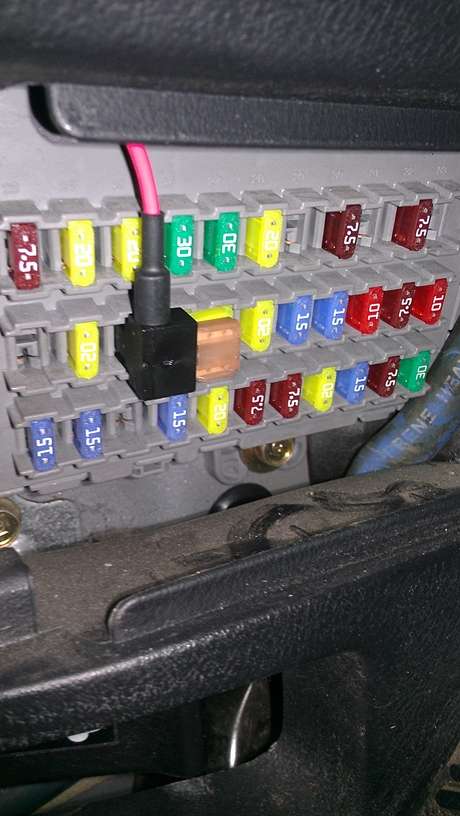
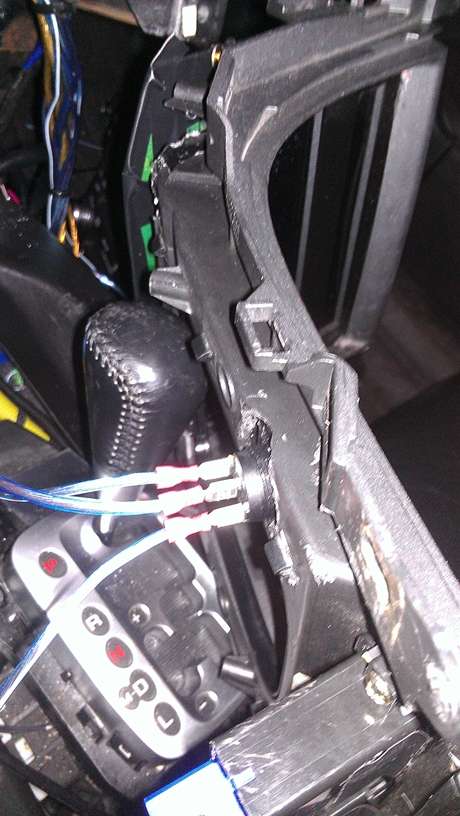
Power in the middle, ground at the top, accessory at the bottom. I blew fuses figuring this one out.
Audio

USB DAC
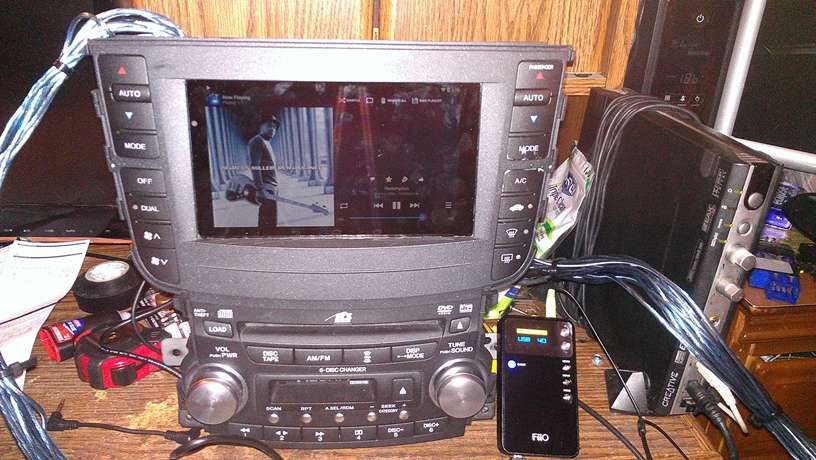
Test run using DSub for Android. In the car, I found that a volume setting of 45 on the FiiO E17 worked best for me.
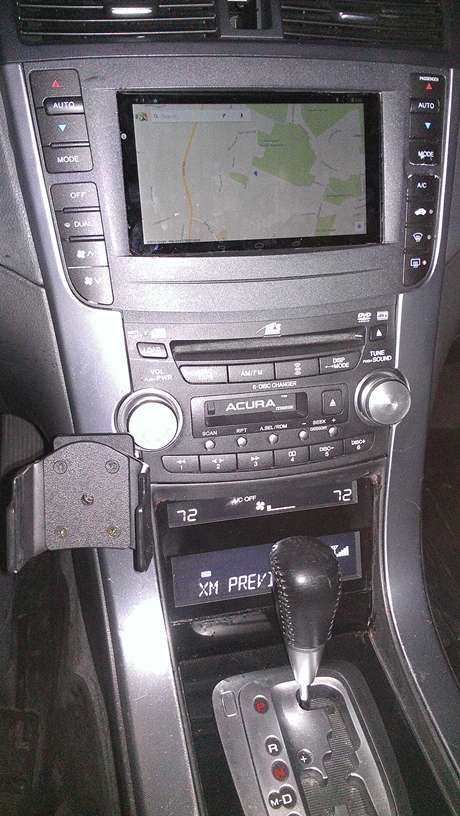
All buttoned up. The thing on the left is a ProClip brand holder for my cell phone.
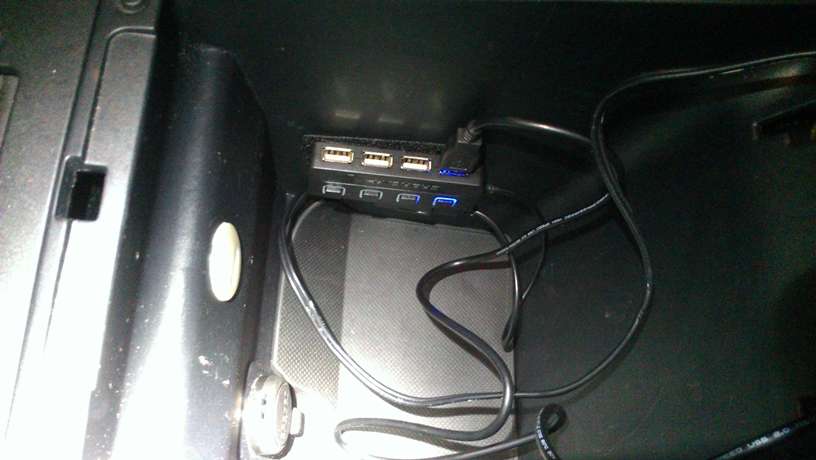
The longer USB extension cables run through the center console to this USB hub.
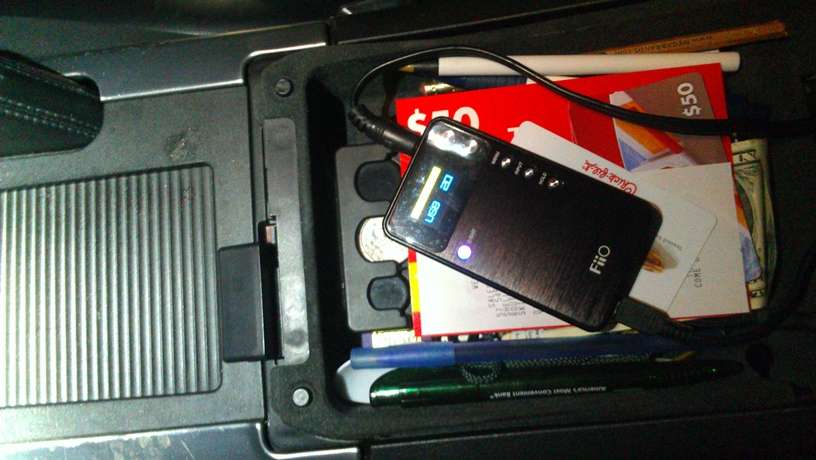
Remember to set the FiiO to remember the last volume setting you used, or it will reset to 20 every time you switch it back on.